
Back in 2016, researchers laid out a prediction that the Live Streaming industry would be worth $70 billion by 2021. Interestingly, they didn’t take into account the coronavirus outbreak, something that encouraged a considerable portion of the human population to resort to live streaming for the first time to keep up with their personal and professional requirements.
In other words, live streaming helps people follow social distancing guidelines without preventing them from interacting with their clients, students, colleagues, employers, or employees.
Whether your job or business involves selling something, teaching students, holding training sessions, you can be there for your target audience without being there in person.
Not only does YouTube give you a chance of broadening your horizons but it allows you to make money off of your content. While most of the top YouTubers upload their videos after having them undergo hours of editing, going live is something that can help you with establishing a personal connection with your followers.
But you cannot simply create a YouTube account today and start live streaming from tomorrow. No, it doesn’t work like that. For that, you will have to get your YouTube channel verified.
Wirecast, XSplit, Nvidia Shadowplay, and OBS Studio are some of the commonly-used software for live streaming. Among these, OBS (Open Broadcaster Software) is the one preferred by many people and for all the right reasons. For starters, it is highly customizable. New features, requested plugins get rolled out every now and then.
The fact that it is open source leads to faster resolution of bugs and other issues. Moreover, it’s free to use and works on Windows, Mac & Linux.
Unfortunately, there isn’t a dedicated user support staff to help you with troubleshooting and learning so in case you are facing any issue or stuck somewhere while navigating OBS, your best hope is to rely on yourself. While there is a plethora of learning material available on the internet to help newbies get familiar with the software, you might have a tough time configuring this software.
This calls for a suitable alternative… BeLive!
Whether you want to host photo or video-sharing sessions, conduct split-screen interviews and talk shows of up to four people, and even sell items using Live Sales List and Link. BeLive has got you covered.
Here’s how you can go live on YouTube using BeLive!
1. Choose YouTube as your destination once you log into BeLive and then write a caption for your show. You will also be asked to connect a Google account of yours with BeLive.
2. Schedule your show by announcing a date and time you will go live at. After that, add a cover photo for your video, prepare a caption, and save your schedule. You can also edit your scheduled live.
3. Start promoting your show once it has been scheduled. You can do so by sharing your show with your followers on other social media platforms. Be sure to add relevant and trending hashtags to your stream to get more eyes on it.
4. Before broadcasting your stream to your audience, make sure to go live privately and check if everything is in line. This includes the multimedia assets in your studio as well as checking your audio and video. Also, make sure that your audiences’ audio and video are working fine. It’s always better to prepare a checklist beforehand on which you can note down things to check before going live.
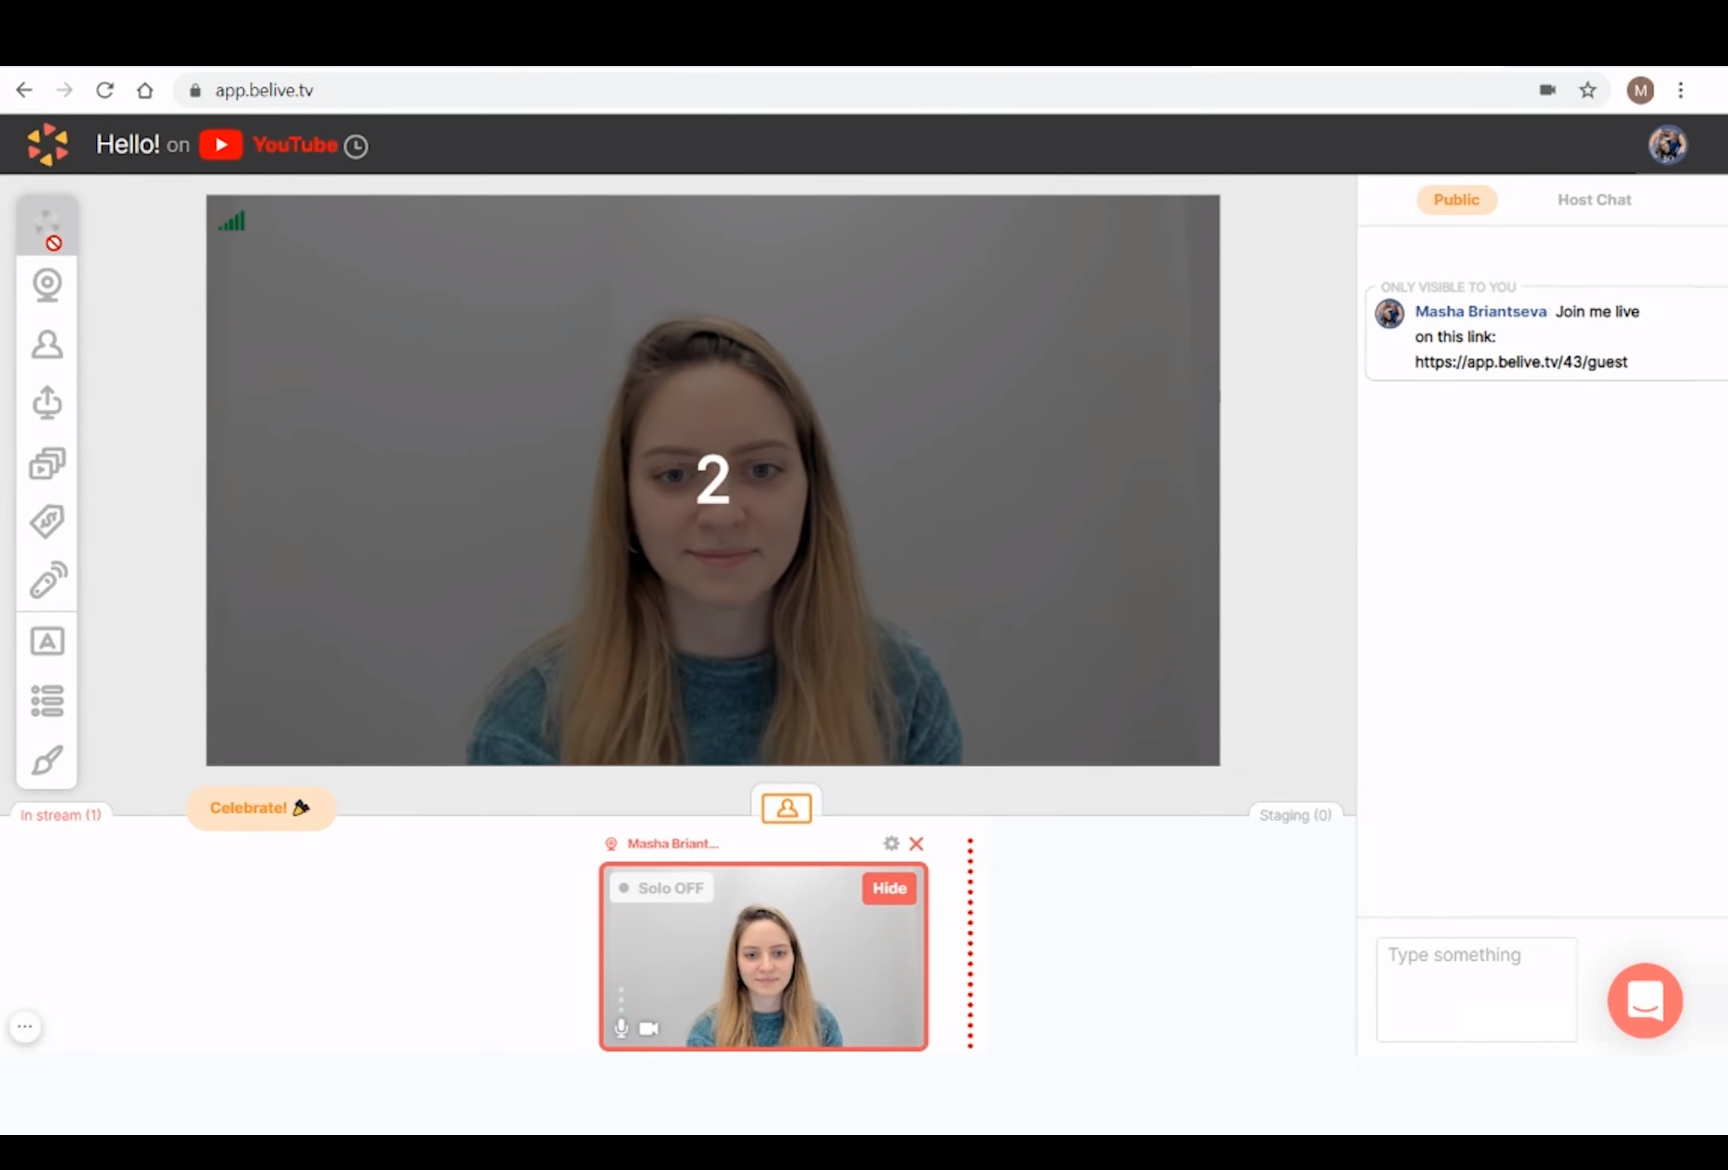
5. Now, you are ready to go live on YouTube. Simply hit the “Start” button and embark on your smooth streaming journey!
BeLive’s official website has several instructional videos and blogs to walk you through different aspects of the streaming experience. It also gives you opportunities to boost your credit count easily. Overall, BeLive is a software that you should be familiar with if live streaming is an important part of your workflow.
In other words, live streaming helps people follow social distancing guidelines without preventing them from interacting with their clients, students, colleagues, employers, or employees.
Whether your job or business involves selling something, teaching students, holding training sessions, you can be there for your target audience without being there in person.
Live Streaming on YouTube
You can live stream on a number of social networking and video sharing platforms. However, if your goal is to reach the maximum people possible, there isn’t a better platform that can help you with that than YouTube.Not only does YouTube give you a chance of broadening your horizons but it allows you to make money off of your content. While most of the top YouTubers upload their videos after having them undergo hours of editing, going live is something that can help you with establishing a personal connection with your followers.
But you cannot simply create a YouTube account today and start live streaming from tomorrow. No, it doesn’t work like that. For that, you will have to get your YouTube channel verified.
Verifying YouTube Channel for Live Streaming
In order to verify your YouTube channel, you will need to submit your phone number. On that number, a verification code will be sent that will allow you to verify your account. Running a verified YouTube channel will not only help you in live streaming but also in adding customized thumbnails and uploading videos that are longer than 15 minutes in duration.Best Software for Live Streaming
There are uncountable software out there that can help you get started with your live streaming ventures. It goes without saying that each software comes with its own set of perks. Some are more tailored to newbies while others target creators who rely on advanced features. Cost also plays a role in this regard. In short, there is no single best software for live streaming and it all comes down to preferences in the end.Wirecast, XSplit, Nvidia Shadowplay, and OBS Studio are some of the commonly-used software for live streaming. Among these, OBS (Open Broadcaster Software) is the one preferred by many people and for all the right reasons. For starters, it is highly customizable. New features, requested plugins get rolled out every now and then.
The fact that it is open source leads to faster resolution of bugs and other issues. Moreover, it’s free to use and works on Windows, Mac & Linux.
Unfortunately, there isn’t a dedicated user support staff to help you with troubleshooting and learning so in case you are facing any issue or stuck somewhere while navigating OBS, your best hope is to rely on yourself. While there is a plethora of learning material available on the internet to help newbies get familiar with the software, you might have a tough time configuring this software.
This calls for a suitable alternative… BeLive!
BeLive for Easy & Effective Live Streaming
Touted as the best Livestream software for YouTube and Facebook, BeLive provides content creators (beginners as well as tech enthusiasts) with an easy to use platform packed with useful tools for live streaming. BeLive doesn’t require you to set up or install anything. Moreover, the availability of a free BeLive course as well as BeLive Masterclass will further ensure that your live streaming experience starts with a bang sooner rather than later.Whether you want to host photo or video-sharing sessions, conduct split-screen interviews and talk shows of up to four people, and even sell items using Live Sales List and Link. BeLive has got you covered.
Here’s how you can go live on YouTube using BeLive!
1. Choose YouTube as your destination once you log into BeLive and then write a caption for your show. You will also be asked to connect a Google account of yours with BeLive.
2. Schedule your show by announcing a date and time you will go live at. After that, add a cover photo for your video, prepare a caption, and save your schedule. You can also edit your scheduled live.
3. Start promoting your show once it has been scheduled. You can do so by sharing your show with your followers on other social media platforms. Be sure to add relevant and trending hashtags to your stream to get more eyes on it.
4. Before broadcasting your stream to your audience, make sure to go live privately and check if everything is in line. This includes the multimedia assets in your studio as well as checking your audio and video. Also, make sure that your audiences’ audio and video are working fine. It’s always better to prepare a checklist beforehand on which you can note down things to check before going live.
5. Now, you are ready to go live on YouTube. Simply hit the “Start” button and embark on your smooth streaming journey!
BeLive’s official website has several instructional videos and blogs to walk you through different aspects of the streaming experience. It also gives you opportunities to boost your credit count easily. Overall, BeLive is a software that you should be familiar with if live streaming is an important part of your workflow.