
Creating videos can be a great way to record your precious memories, and countless online influencers have turned video making into an art form as well as a full time job. Daily vlogs, educational content and more can be optimized through the creation of videos, but you need a high quality editor if you want the finished product to seem polished and professional. Most high end video editors are pricey to say the least, which is why Filmora by Wondershare is a great choice both because of its affordability as well as its versatility.


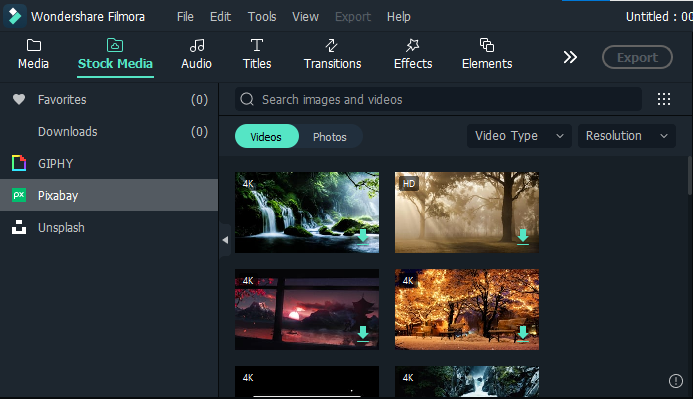
Much of this stock media is sourced through third parties which helps create enough variety that your videos won’t become boring or repetitive. Filmora has collaborated with GIPHY, Pixaba and Unsplash to provide a wide range of media options that you can incorporate into your videos:
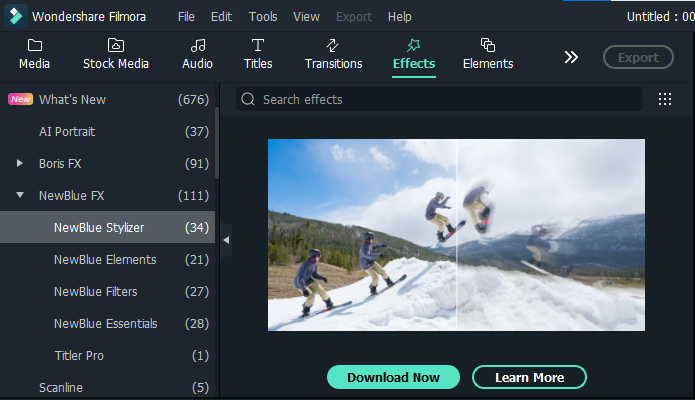
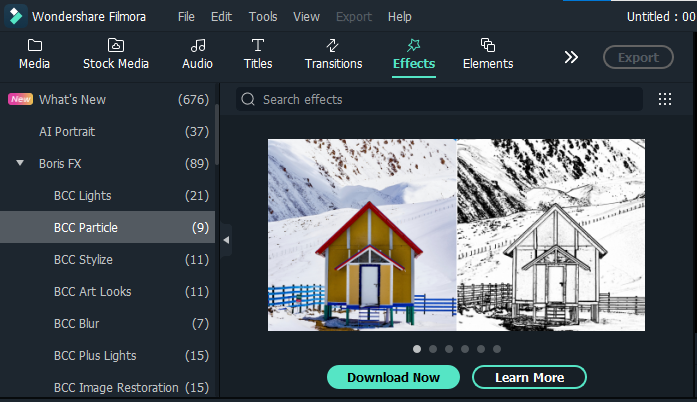
The inclusion of OpenFX and NewBlue FX also brings a wide range of professional effects that you can use to spice up your movies:
However, there are a few more specific advanced features that we looked into as well. There are five exclusive features that stood out to us:

Step 1 – Create a new project
Open up Filmora and select the blue Create New Project rectangle. This will take you to the main editing UI.
Step 2 – Choose your aspect ratio
Your aspect ratio plays a huge role in how your video turns out. Select the wide 16:9 aspect ratio for a more cinematic look, 1:1 if you’re optimizing videos for Instagram or customize your own aspect ratio based on your needs. Go to Project Settings and select your desired aspect ratio.
Step 3 – Import Your Media
It’s time to start adding the ingredients that will make your dish. In the Media section, click on Import. There will be several options available. Select the Import with Instant Cutter tool if you have large UHD files that you need to edit quickly.
Step 4 – Organize Your Folders
Most videos have large amounts of footage, so it’s important to get organized. Click on New Folder in the My Albums section of the Media tab, then sort your media into folders as you see fit. This can help you edit your videos less stressfully.
Step 5 – Add Media to the Timeline
The timeline is the bottom half of the Filmora UI. Add your media to it and start trimming the parts that you don’t need. Move the media around so that it’s arranged in the right sequence.
Step 6 – Color correct and add effects
Filmora 11 has a wide range of effects that you can use to spruce up your videos. Go to the Effects tab and try to incorporate some transitions between your shots. You can also add titles and graphics from the effects tab. You can also color correct your video with the various filters available in the Effects tab as well as add some overlays.
Step 7 – Export File
And you’re done! Now all that’s left to do is export your edited video and upload it.
Filmora’s Most Useful Features
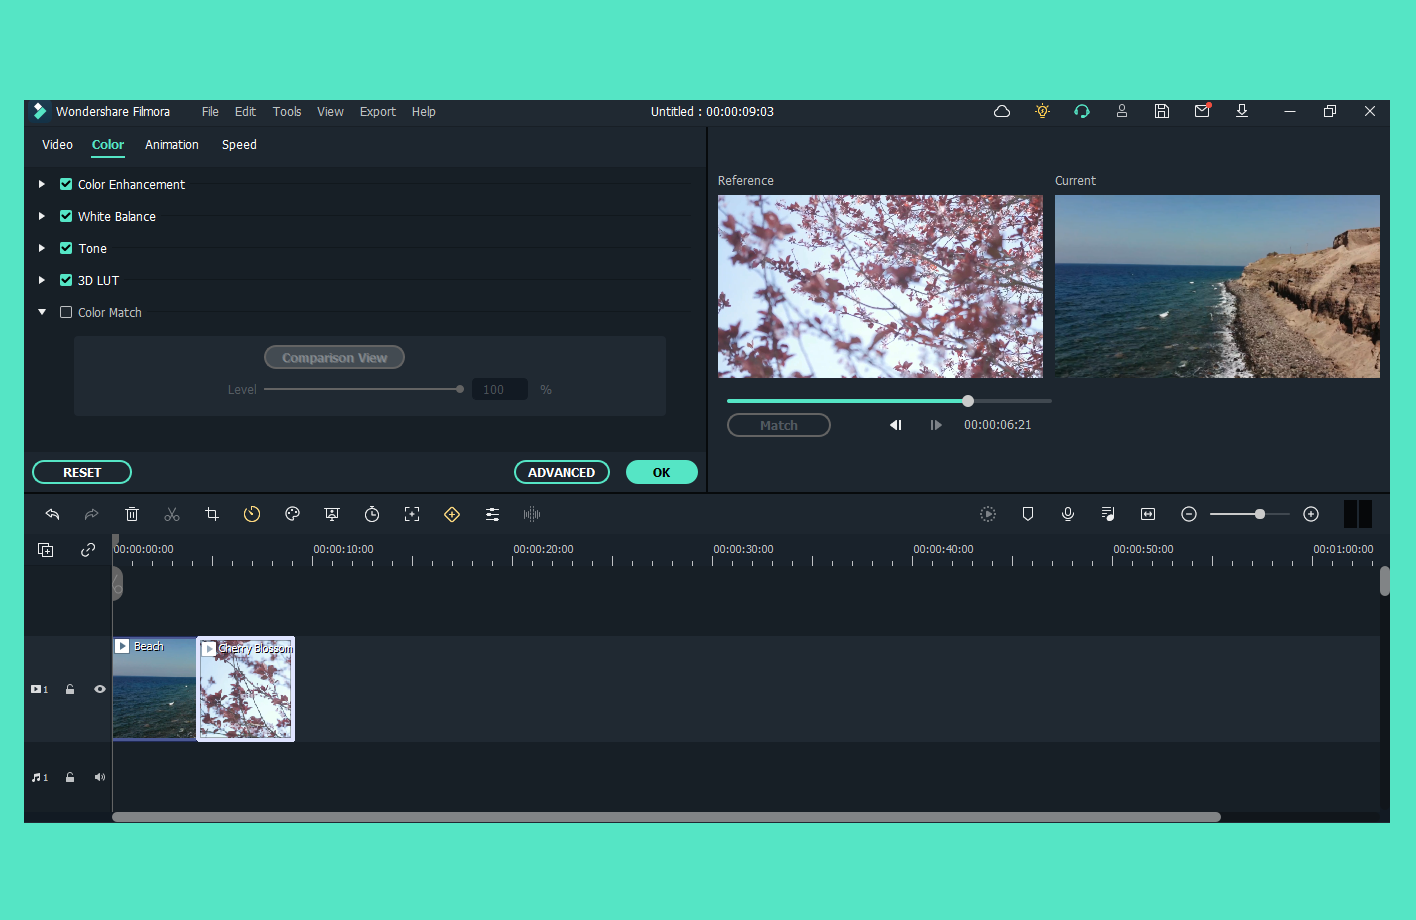
Filmora has five basic features that can help you edit amazing videos:1. Color Match
Color correction is essential if you want your videos to have a consistent feel. With Filmora’s color match feature, you can simply press Alt+M to open the Color Matching section. This lets you select different clips in your video and color correct them automatically which is a lot simpler than painstakingly going through each frame!2. Green Screen
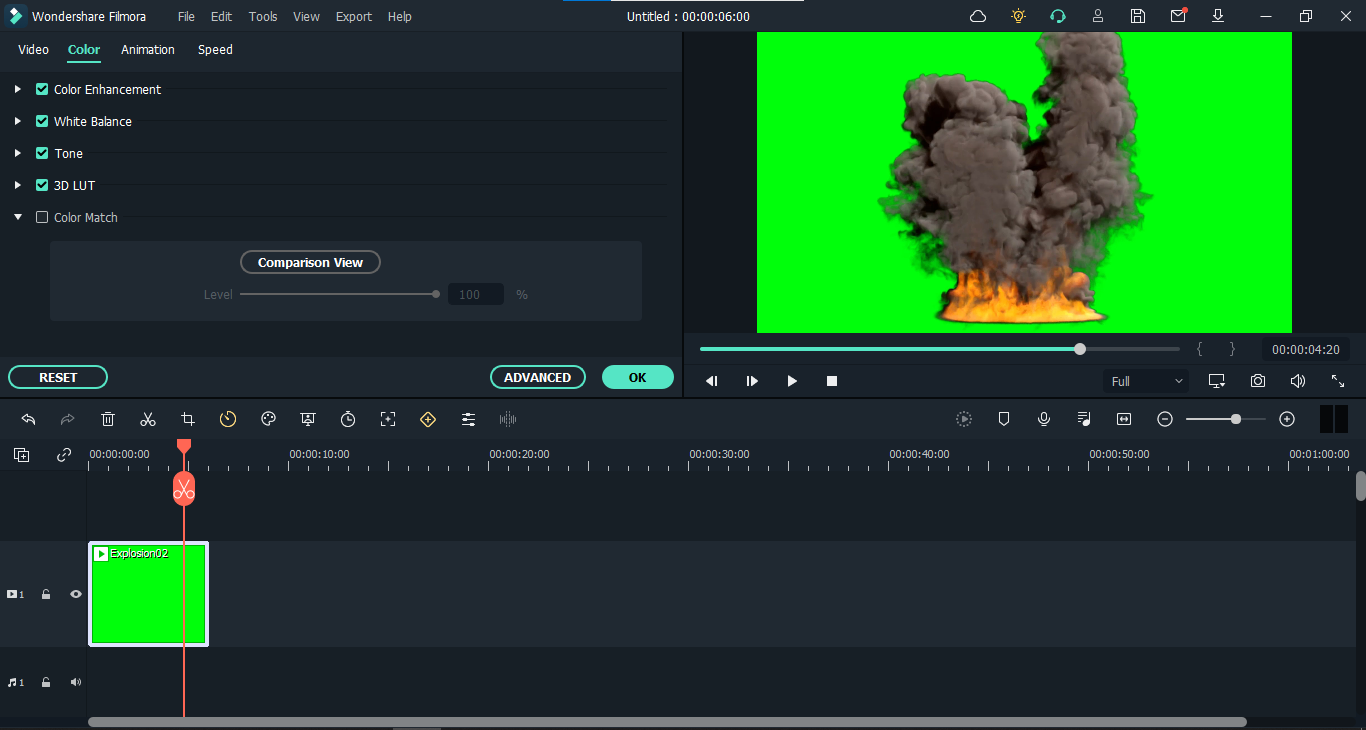
Filmora also has a great green screen feature that lets you change backgrounds and combine different shots. This lets you obtain high quality shots on a low production budget and can expand your video editing options tremendously.3. Split Screen
The split screen feature lets you display multiple clips simultaneously, and Filmora has 30 different split screen templates to choose from. You can play up to six clips at the same time in a wide range of formats and layouts4. Motion Tracking
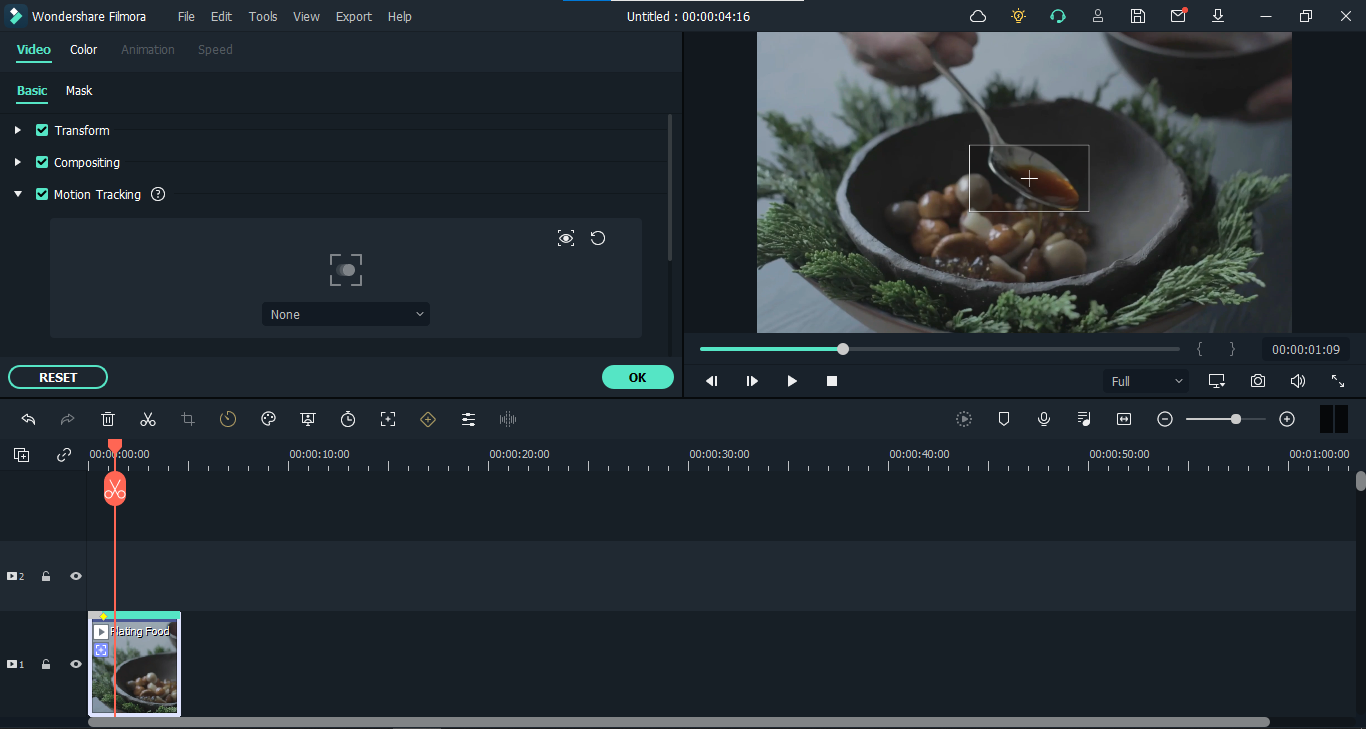
Motion tracking is a relatively advanced feature, so it’s impressive that an affordable service like Filmora lets you utilize it. You can add various elements to your videos that would follow the path of moving objects that you select which is great for drawing attention to calls to action such as a Subscribe prompt.5. Audio Ducking
A big part of making your video immersive is to add audio to it, which is why so many popular videos have soundtracks. However, if these soundtracks start to drown out the voiceover or other important audio elements that might detract from the overall quality of your content. That’s where Filmora’s audio ducking feature comes in. It allows you to selectively reduce the volume of one audio track whenever a different audio track comes in.Filmora 11: What the New Version Brings to the Table
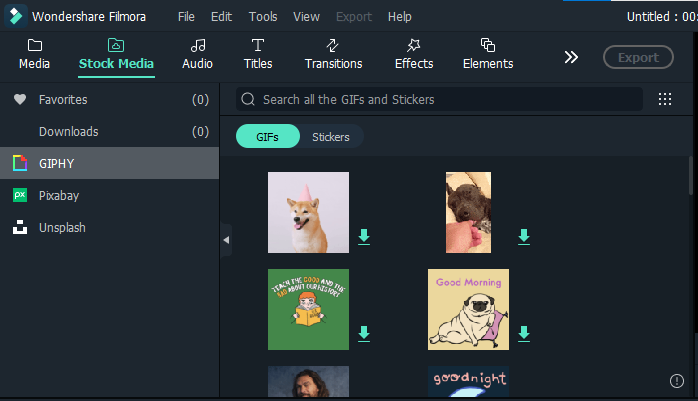
Wondershare released the latest version of Filmora video editor on 18th February 2022. They’re calling it Filmora 11, and it brings a whole host of new features that can help you create higher quality content. Amidst a slew of new presets that speed up the editing process, Filmora 11 has also massively expanded its stock media catalog.Much of this stock media is sourced through third parties which helps create enough variety that your videos won’t become boring or repetitive. Filmora has collaborated with GIPHY, Pixaba and Unsplash to provide a wide range of media options that you can incorporate into your videos:
The inclusion of OpenFX and NewBlue FX also brings a wide range of professional effects that you can use to spice up your movies:
However, there are a few more specific advanced features that we looked into as well. There are five exclusive features that stood out to us:
1. Template Mode
Filmora’s template mode is an ideal feature for content creators that are short on time. You can use one of their pre-made video templates to create a framework for your video or to supplement clips that you have already shot. These templates are sorted by genre so that content creators can choose specific clips for business presentations, daily vlogs or any other video content that they might be working on.2. Speed Ramping
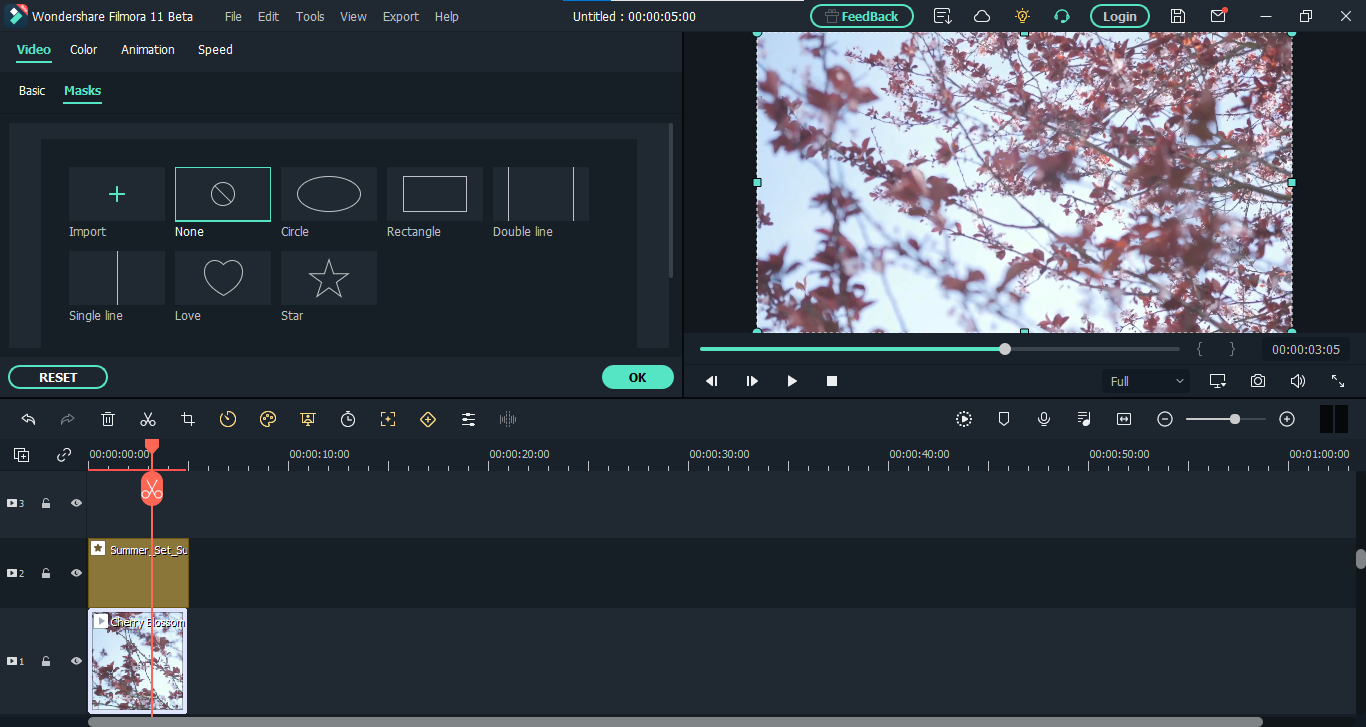
Speed ramps can make your content more engaging by allowing you to manipulate playback speeds between shots. The best thing about speed ramping in Filmora 11 is that it creates a gradual shift in speed which results in smoother transitions. It would be best if you used a high frame rate if you want to incorporate this feature into your editing process.3. Masking
A great way to make your content more compelling is by revealing various components of the shot gradually instead of all at once. Masking lets you do that by creating a matte that can conceal layers which helps draw the attention of your viewers towards the more important aspects of the shot.4. Auto Beat Sync
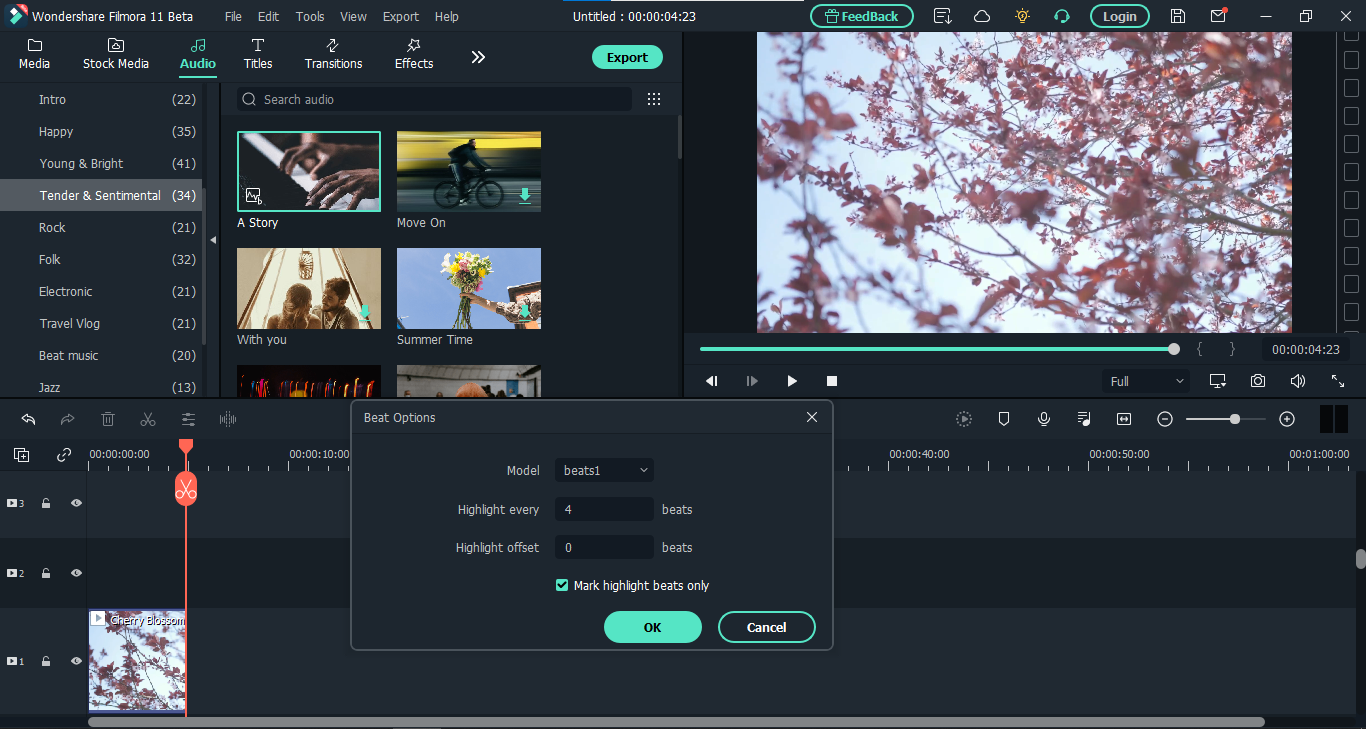
Beat syncing is a popular way to make video editing easy and seamless. By syncing your video’s cuts to the beat of a music track with Filmora’s Beat Detection algorithm, you can create a steady rhythm for your content that would keep viewers engaged. It can also help you avoid having to spend hours figuring out the right timing for each cut.5. Audio Synchronization
In order to ensure high content quality, it is important to record audio and video separately. That ensures that each file will be crystal clear, and you can merge them together with Filmora’s Audio Synchronization feature. Just select both files, right click and then select the Merge option. This will create a new file in which both audio and video are synced up perfectly.How to Make a Good Video Using Filmora
Follow this step by step guide to start editing videos with Filmora 11:Step 1 – Create a new project
Open up Filmora and select the blue Create New Project rectangle. This will take you to the main editing UI.
Step 2 – Choose your aspect ratio
Your aspect ratio plays a huge role in how your video turns out. Select the wide 16:9 aspect ratio for a more cinematic look, 1:1 if you’re optimizing videos for Instagram or customize your own aspect ratio based on your needs. Go to Project Settings and select your desired aspect ratio.
Step 3 – Import Your Media
It’s time to start adding the ingredients that will make your dish. In the Media section, click on Import. There will be several options available. Select the Import with Instant Cutter tool if you have large UHD files that you need to edit quickly.
Step 4 – Organize Your Folders
Most videos have large amounts of footage, so it’s important to get organized. Click on New Folder in the My Albums section of the Media tab, then sort your media into folders as you see fit. This can help you edit your videos less stressfully.
Step 5 – Add Media to the Timeline
The timeline is the bottom half of the Filmora UI. Add your media to it and start trimming the parts that you don’t need. Move the media around so that it’s arranged in the right sequence.
Step 6 – Color correct and add effects
Filmora 11 has a wide range of effects that you can use to spruce up your videos. Go to the Effects tab and try to incorporate some transitions between your shots. You can also add titles and graphics from the effects tab. You can also color correct your video with the various filters available in the Effects tab as well as add some overlays.
Step 7 – Export File
And you’re done! Now all that’s left to do is export your edited video and upload it.